
One of the items on my 22 in 2022 list was to make a fabric pennant. I have been on a zero waste kick for almost the past year and, while we have the boys' shared birthday party down to almost zero waste (using reusable dishes/cups/utensils and cloth napkins), the one thing we had been doing was making a balloon garland for the last few years. It was always very festive and stayed up about 2 months. This was especially cheery in the early days of the pandemic since we had their party that year the day after Luke's last day of in person school and the balloons stayed up until about the end of that school year.
So, I wanted a reusable solution and this was the one I came up with. I intended to have it done for Sam's birthday at the beginning of March but then I put off starting and it ended up just barely being done before their party at the end of the month. But it did get done! And it's still up today, nearly 6 weeks later (maybe after school is out I'll take it down?). There were A LOT of steps but nothing confusing, just took time spread over a month to get it done!

The first step was searching Pinterest for ideas. I had a general idea of what I was going for but was looking for some guidance. That led me to this tutorial from The Happy Housie which I basically followed, although mine was significantly longer than hers (my total between three strands is 48 feet.) I went through my fabric stash and started pulling the blue and green pieces I had that would be big enough. I also was texting my sewing sister often and she offered some guidance AND some of her fabric scraps. One the money saving tips she gave me is that, instead of buying a triangle template, I could just make one out of cardboard. So I did that. Definitely nicked it many times but it was a free solution!
Once I had a sizable fabric stash, and had procrastinated starting for awhile, I got to cutting. I used my rotary cutter, my cardboard guide, and a cutting mat. (For reference, my triangle is 6 inches at the base and is 9 inches long) And a whole lot of fabric. My finished pennant has 75 double sided flags which meant I cut out more than 150 of these (I miscalculated a bit how many I would need.) So I cut and cut and cut. Counted them. Cut and cut and cut. Made sure I had an even number of any fabric. Cut and cut.


Next up was ironing. That was pretty straight forward and I did most of that during family movie night. Sam wondered what the iron and ironing board was (there is a good chance that's the first time he's ever seen it in use) and Luke thought it was so fun and ironed a decent chunk of them for me (no fingers were burnt!).
Then it was pinning, pinned every single set together, the good sides in. Pin, pin, pin.
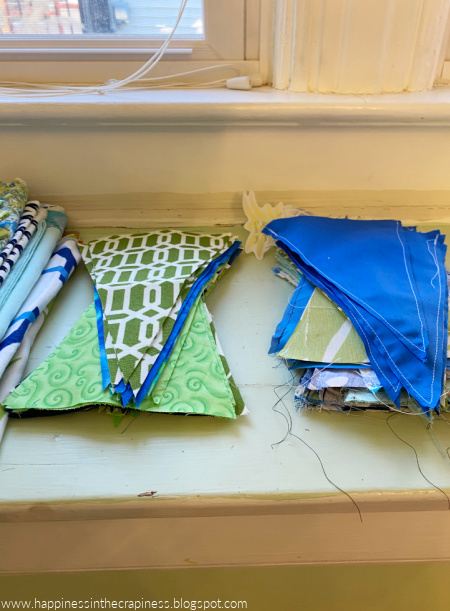

Next was sewing them all together. I did these in chunks, maybe 25-30 in a session. I was working on this earlier this spring when we had the occasional nice day where we all wanted to be outside so I was doing this work around colder/rainy days and doing a lot of the tedious pinning and ironing during movie nights.

These steps all sound easy, and they really were. Just time consuming when there were 75 pennants to make! I did some bouncing between steps based on keeping my hands busy during movie night (key to staying awake) and I obviously didn't want to be running my sewing machine then because nobody would be able to hear the movie! So just managing steps to keep it moving.

My ONLY purchase for this project was 3 rolls of white 1.5" Grograin ribbon from JoAnn. I had decided to do mine in 3 segments because it just seemed easier to deal with than one long strand, also I didn't want to do the complicated math of figuring out where I should leave slightly larger gaps for the turns. Plus, that way I wouldn't have to patch together any strands of ribbon. (I specifically remember rushing to pick up this order after the grocery store and then frantically getting home because the furnace guys were due any minute to give us an estimate on fixing/replacing (it ended up being replacing) our furnace...then they didn't show up for over an hour.)
Before I pinned the pennants to the ribbon I also ironed the ribbon in half so I would know where to pin the pennants. Another movie night activity!

Once I had my initial set all cut, ironed, pinned, sewn, trimmed,
flipped, and ironed, THEN I sorted them all into piles. Solid blue,
patterned blue, patterned blue & green, patterned green, and solid
green. I counted what I had of each so I could figure out how to spread
out the different colors and patterns.

Then, maybe the most fun part of this besides the hanging? I started pinning. It was a tiny bit anxiety inducing, trying to make sure I kept some semblance of order without it looking too orderly. I hadn't specifically cut out an equal number of anything, just picked from what fabrics I had so I couldn't have done a perfect pattern anyways. And I think it came out just right to look like a good variety but still casual. I used a 2 inch spacing between my pennants.

I sewed a loop on each end and then hung it up! (And removed the pins!) Tightened my loops and then we were good! This first piece was the easiest to hang too because we just used the nails that were still up from the balloons.
Then I repeated the process on the other two, shorter pieces. I ran into just two small (personal) problems. I specifically laid out one pennant thinking it would go in the front part of the room and going off the colors of that one. But miscalculated which pennant was which and it made me slightly displeased with how they came together but not enough to tear the whole thing apart! (I just realized I could flip my longest piece and the colors would come out like I had planned...)

Then, when I was pinning the last pennant I realized I was going to be short. Took some measurements and decided I was going to need 5 more sets of flags. It was pretty demoralizing because, while the steps are easy there are just a lot of them and I thought I was almost done! And I was frustrated that I had screwed up my math a bit. So I went back, made 5 more, pinned them, sewed them, and then realized it was too long and had to cut 2 of them off. *face palm* BUT, then it was done.
 |
| (You can see in the background another 22 in 2022 project in process, which has also since been mostly completed!) |
It took me tiny bit to get used to them hanging up, they are high enough, and we are short enough, that we don't hit our heads on them (even though I can reach them without standing on tiptoe). They added some festiveness to our party AND they will be all ready to go next year! With nothing in the trash other than some thread and fabric scraps!
A particular fun part for me is that, instead of a patchwork quilt, it's a bit of a patchwork pennant and I can trace many of the pieces to various project I've done in the past (my wristlet, tote bags, the kitchen valance, our bedroom bench cushion, the curtains in my office, book coverings, chairs from my grandparents, and more!) I can point to so many pennants and tell you what I bought the fabric for (nobody cares to hear this, but I COULD tell you) and there are a lot of nice memories up there.
This was a very satisfying project. I got to use a lot of fabric with memories. I got to sew again! I made something to replace a disposable item! And our house has had a festive air for weeks without having balloons deflate! It was a bit time consuming, but not hard, and mostly enjoyable. It was fun!

No comments:
Post a Comment