

The transformation is a little mind blowing. Not just from what we lived with for 8 years but also from the various in progress shots from the last 12 weeks. I never actually saw it looking like it did in the middle but I still saw plenty of disasters in there since. Hard to believe we lived with the open insulation, plywood, bucket toilet for what felt like forever and now we have a beautiful bathroom.
 |
| Vanity & sink area |
 |
| The tub/shower. You can't see the laundry cute but it's under the back shelf in the shower. So handy. |
It's still a small space, about 6'x6'. We didn't expand but did gain a better layout. The maybe 2 square foot corner where the laundry hamper was is now part of the main space which is a huge difference. We lost that little part wall which added a little space. We couldn't fit in a double sink but we have a giant sink with two faucets and that's pretty amazing! (We don't have to go back and forth on water temperature if I'm washing my face and Matt's brushing his teeth! Or we can easily both brush our teeth at the same time!). The only thing better about the old bathroom was the placement of the toilet paper but I can definitely deal with that.
I don't know that I can even recap all that we (Matt) did in there but here's my attempt:
-tore out the window and replaced boards on the outside of the house to match, caulked, and painted
-tore out the entire existing bathroom including tub, toilet, vanity, tile floor, drywall, and insulation
-replaced some of the original subfloor and added a whole new layer of subfloor to give the eventual stone floor a good base
-replaced some of the studs, replaced all the insulation
-completely we did all the plumbing since all fixtures were moving
-completely rewired all the electrical since all outlets, switches, and lights were moving
-placed new tub
-built shelf for the back of the tub, including spot for laundry chute and a cupboard below
-built shelf into the wall, where the window was
-hung drywall/cement board on all walls and ceiling
-laid stone floor, grouted, sealed
-installed new toilet in new location
-tiled the shower, grouted and sealed
-mudded, taped, and sanded the ceiling & walls
-primed walls, painted the ceiling and upper one color and the lower part another. Changed minds on lower paint color and repainted.
-installed mirrored medicine cabinets
-put in new baseboards and the trim on the upper part of the wall
-put in new light over the sink
-installed new vanity
-added new towel hook
-put a new transition between the landing carpet & the bathroom stone floor
-added shelves above the toilet
All that took Matt a few hundred hours. It consumed much of May & June. We had multiple family members lend us labor which was incredibly helpful, especially for things we needed more than 2 hands on (like hanging ceiling drywall) or things Matt had never done before (like installing the stone floor). I'm really proud of all that he did and worked and figured out how to do (first time really tiling was during the shower surround!).
What's left to do:
Matt
-add tiled back splash around the sink
-sand down main door and repaint white
-door for laundry chute (the hole is so small, there is no danger of Luke falling down it, he could drop stuff but he's not in the bathroom enough for that to be a concern.)
-door for cabinet below laundry chute (where we have our dirty bathroom things like the toilet cleaner & brush. So far Luke hasn't found it.)
Diana
-fill & style the shelves above the toilet (was working on that earlier today)
-add some art on the wall to the left of the sink
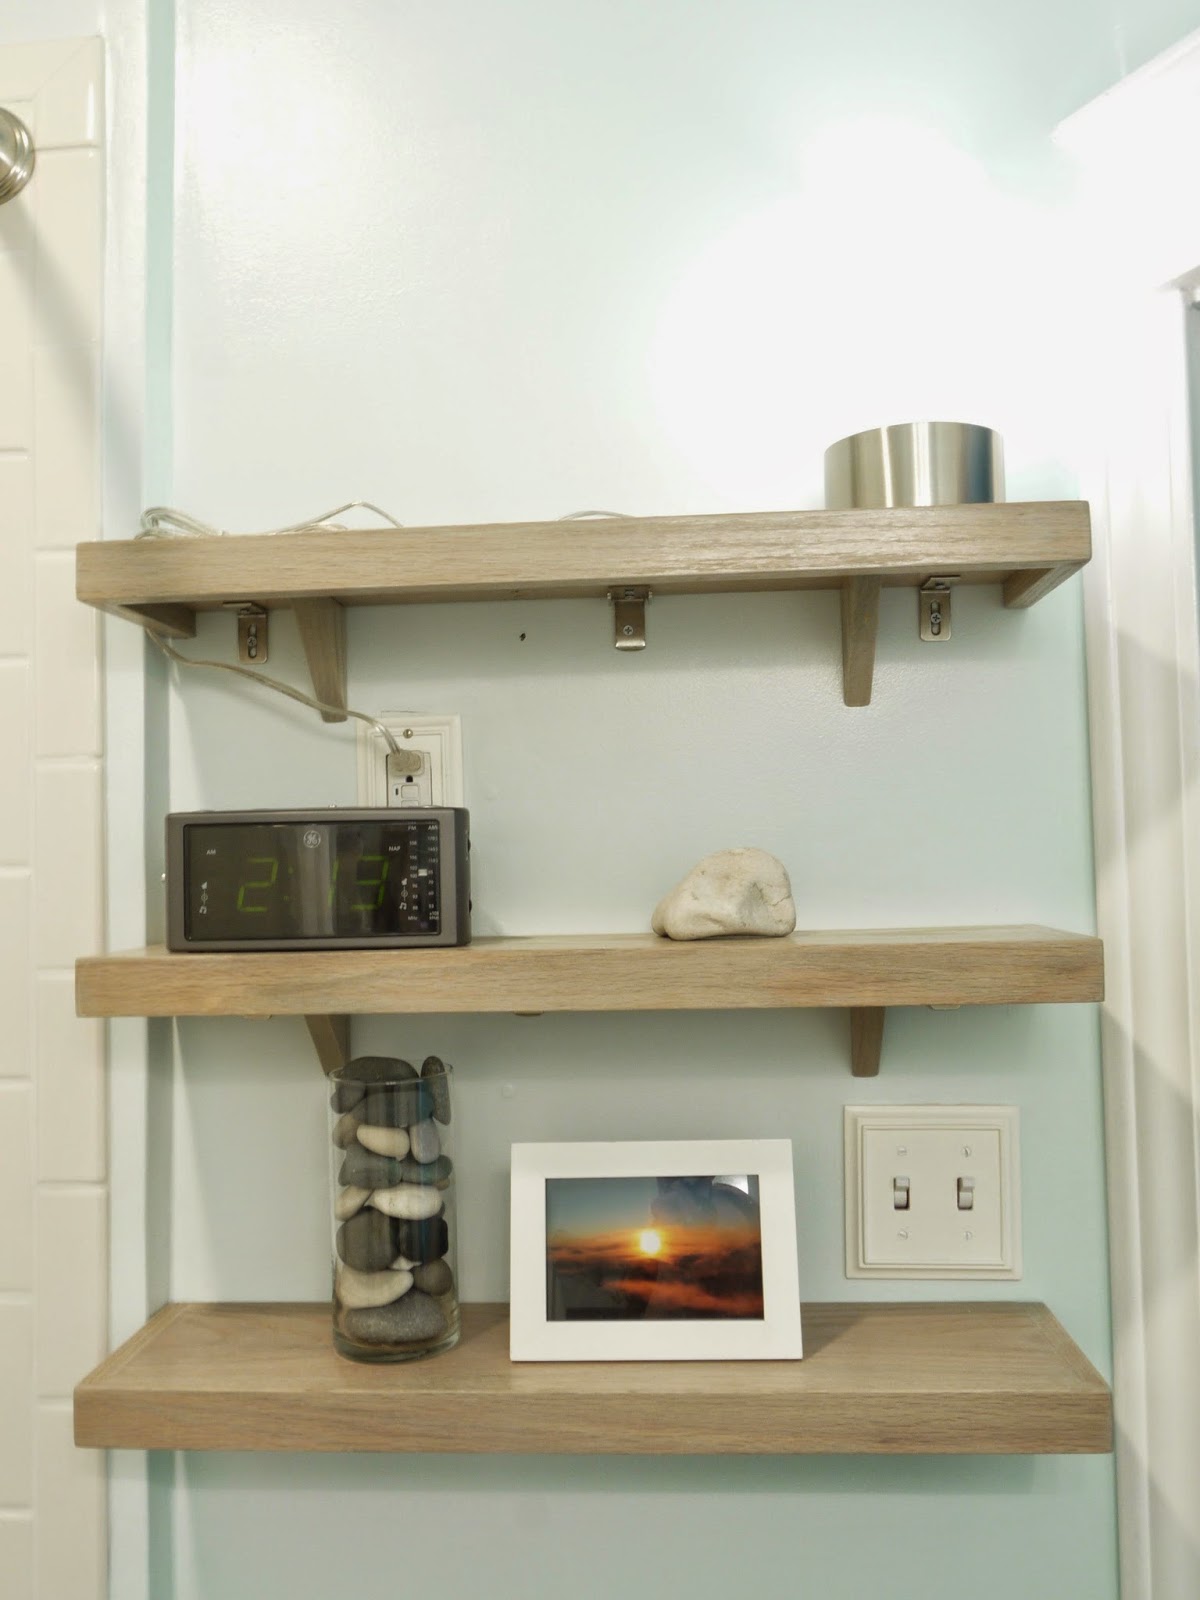 |
| Shelves over the toilet that need filled. The thing on the top that looks like a roll of shiny tape is actually a touch lamp we use as a nightlight in there. |
-The vanity is from IKEA, the Godmorgon/Braviken in high gloss grey (we got Matt's nephew to pick that up for us). I LOVE it.
-The green pebble flooring is from The Tile Shop.
-We got the inspiration for the vertical shower tiles with the dark corner accent from The Tile Shop, mainly here and here. We checked out their local store 16 days after it opened. Although the grey tile is from Lowes and the white subway tile is from Menards (but sold many places).
-The dropped ceiling color accent inspiration is from Young House Love.
-This was the basic color scheme we followed although using blue and grey and green (the colors of the sea in Sarah, Plain and Tall) is nothing new in our house.
After talking about this project for so long it's a little crazy that it's almost done! Time went fast but then I think back to May...Luke really started walking on his own the same weekend the old bathroom came out. That's makes it feel like a long time ago! Hard to put into words how much we love it and how proud I am of Matt for taking this on. It's incredibly fulfilling to see something we've been planning for 8+ years and working on for 3 months come together so perfectly.

3 comments:
Ahhh I didn't see how big the vanity was in your facebook pic, with the double faucet!!! Genius and BEAUTIFUL! I love it all! I want to come pet the tile and everything soon!!!! :D
Haha, Luke pets the tile often during bathtime. I don't blame him...
We do too!!
Post a Comment